What is the texture editor?
The texture editor is that screen that opens up every time you click on "Edit Texture", for facial parts, body, outfits, and accessories.
From this editor, you can import and export textures too.
In this article, we'll explain how the editor works and take a look at what you can do with it.
On This Screen
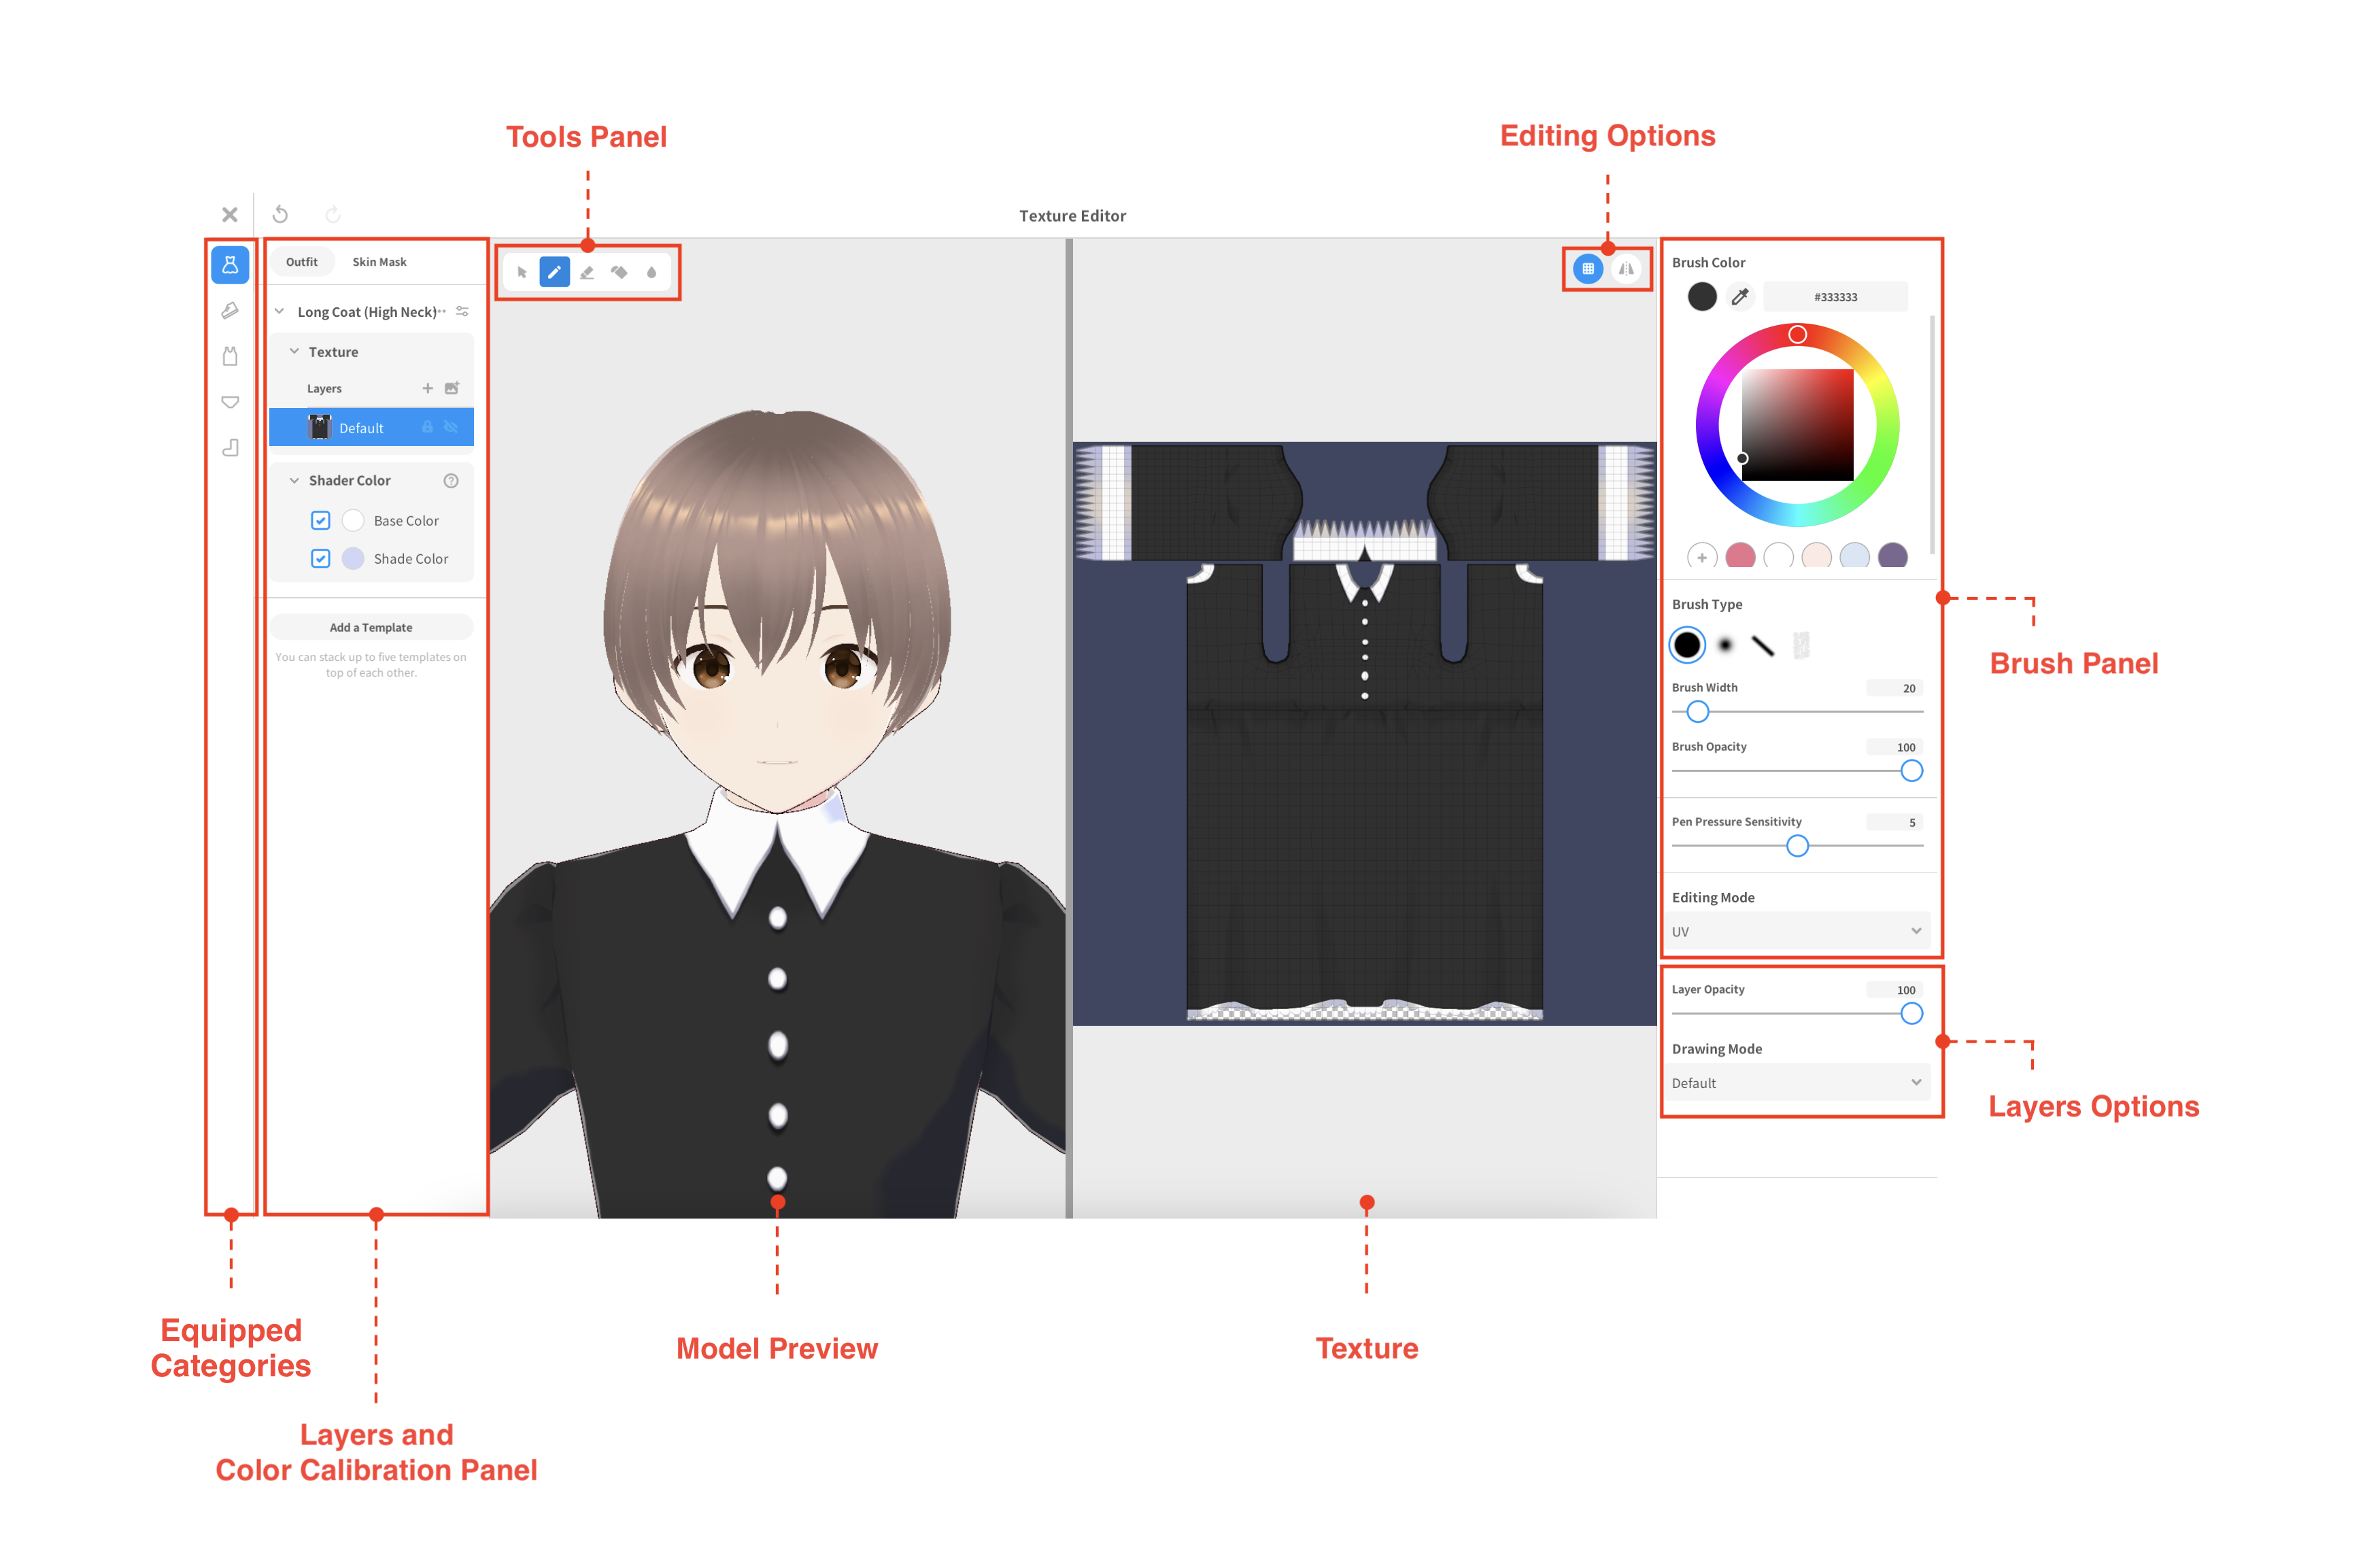
Equipped Categories
Displayed here are the categories your model is currently wearing.
You can edit the texture for all items in these categories.
Layers and Color Calibration Panel
In this panel the layers of each texture are displayed, and you can check and adjust the colors from the color calibration menu.
For more information, please check the link below.
▼I want to know more about Color Calibration
https://vroid.pixiv.help/hc/en-us/articles/4405438979225
Model Preview
See your model displayed here.
Every time you edit a texture, it will be applied in real-time.
You can also use the brush tool directly on the model.
Tools Panel
In this panel are all the tools you can use to edit the texture.
Keep an eye on this panel to make sure you have the right tool selected at any time.
Select |
Not applicable |
|
Brush |
Use this to draw on the texture |
|
Eraser |
Use this to delete parts of the texture |
|
Bucket |
Use this to fill an area with color based on the clicked spot on the texture |
|
Blur |
Use this to add a blurred effect to parts of the texture |
Texture
The 2D image you see displayed here is the texture.
You can draw directly on it with the brush tool.
The image and its shape are different for every item.
Editing Options
From there you can toggle on/off both the guidelines and mirroring.
The icon is blue when the option is enabled.
Guidelines Visibility |
Makes the guidelines (grid) on the texture visible |
|
Mirror |
Turn this on to have what you draw symmetrically reflected (vertically) |
Brush Panel
From this panel, you can change any settings related to the brush you use to draw on the texture.
Brush Color
Here you can edit the color of the brush.
You can use the color picker too.
Click (or tap, on the iPad) on the + button at any time to save the color you're currently using.
Right-click (or tap twice, on the iPad) on any of the saved colors to edit or remove them.
Brush Type
Change the shape of the brush you're using.
Brush Width
Change the size of the brush.
Brush Opacity
Change the level of opacity of your stroke.
Pen Pressure Sensitivity
Adjust how much the brush size varies with pen pressure.
Editing Mode
When the 2D texture is applied to the 3D model, some parts of it may look distorted, as it stretches following the guides (grid).
Editing Mode lets you choose if you want to draw on a two-dimensional texture, or a three-dimensional model.
World |
Use this editing mode if you want to draw directly on the 3D model without getting any kind of distortion. |
UV |
Use this editing mode if you prefer drawing on the texture and not the 3D model. What you draw won't be distorted on the texture, but it may be on the 3D model. |
Bucket Panel
Modify settings for the Bucket tool used to fill areas of the texture.
Fill Color
Change the color used by the Bucket tool.
Pick colors with an eyedropper or save them by clicking (or tapping, on the iPad) the + button.
Right-click (or double-tap, on the iPad) on any saved colors to edit or delete them.
Fill Opacity
Change the level of opacity of the Bucket tool.
Fill Tolerance
Set how different the clicked color can be to fill an area.
Lower values fill areas that are very similar in color, while higher values fill areas that are more different in color.
Expand Area
Modify the range of the fill area.
Lower values contract the filling area evenly, while higher values expand it.
Layers Options
Check this section if you need to change the editing mode or the opacity for the layer of texture you're editing.
Related articles:
About layer opacity and display in the 3D view