This article describes how to export costumes and accessories created in VRoid Studio as XWear data.
There are two ways to convert costumes and accessories made in VRoid Studio to XWear data.
- Bulk export all worn costumes and accessories
- Export custom items individually
Not all custom items can be exported. Here’s what you can and cannot export.
○ Exportable custom items
・All Outfit categories
・All Accessory categories (Bulk export only)
× Non-exportable custom items
・All Face categories
・All Hair categories
・All Body categories
Exporting custom items as a single file
With this method, you can export all the outfits and accessories the model is wearing as a single XWear file.
This is useful when you want to export a complete outfit including a top, bottoms, and shoes as a single set.
*Accessories can only be exported using this bulk XWear export method.
1. Dress your model in the desired outfit
Make sure your model is wearing all the clothes and accessories you intend to export.
Everything the model is wearing will be exported together.
2. From the top left menu, click "Bulk export worn items as XWear"
A dialog will appear allowing you to choose a save location.
Select where you want to save the file and you're done.
Textures from the “Body” category are not exported with this method.

For example, if chokers, leg belts, or rings are added as “Body” textures,
they won’t be included in the XWear export.
To export these textures, move them to categories like “Neckwear” or “Legwear”,
then re-import them as texture files.
Outfits you export as XWear data can be imported from "Add Costume" in the dress-up feature.
When you load an XWear file, it imports the entire outfit and allows for adjustments like auto-fitting.
Once imported, the outfit is divided into categories like “Top” and “Bottom” based on the VRoid editor’s structure.
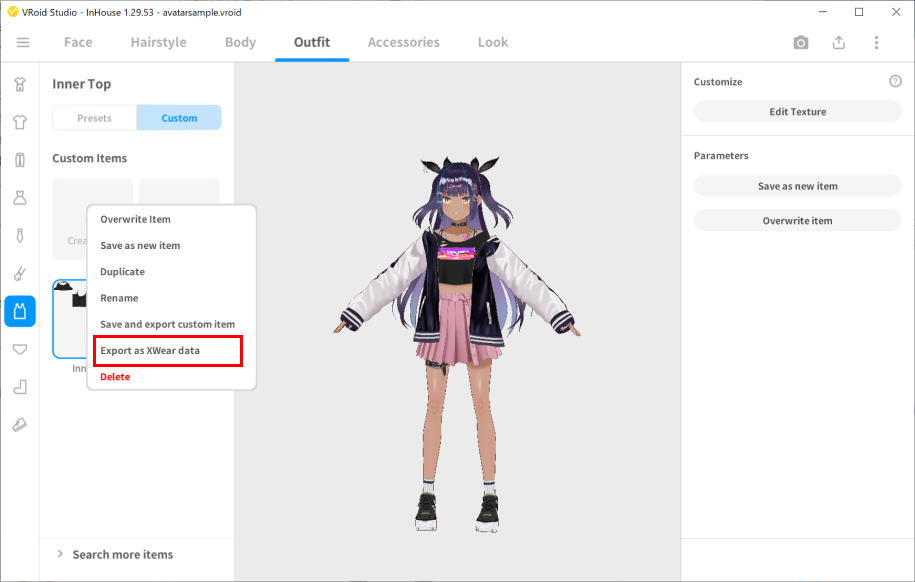
Exporting custom items individually
This option allows you to export specific items separately.
It’s suitable for creating data files for specific pieces, like just the top or only the shoes.
*Accessories cannot be exported individually.
1. From the custom item's menu, click "Export as XWear data"
A dialog will appear allowing you to choose a save location.
Select where you want to save the file and you're done.
Outfits you export as XWear data can be imported from "Add Costume" in the dress-up feature.
Just like with bulk-exported outfits, you can load the data and make adjustments such as auto-fitting after the import.
Example model used
・VRoid model (AvatarSample_B)
・Mochiyama Kingyo's Mamehinata/Original 3D Model
Related articles:
Getting Started with the Dress-up Feature (for those who want to dress up their characters)