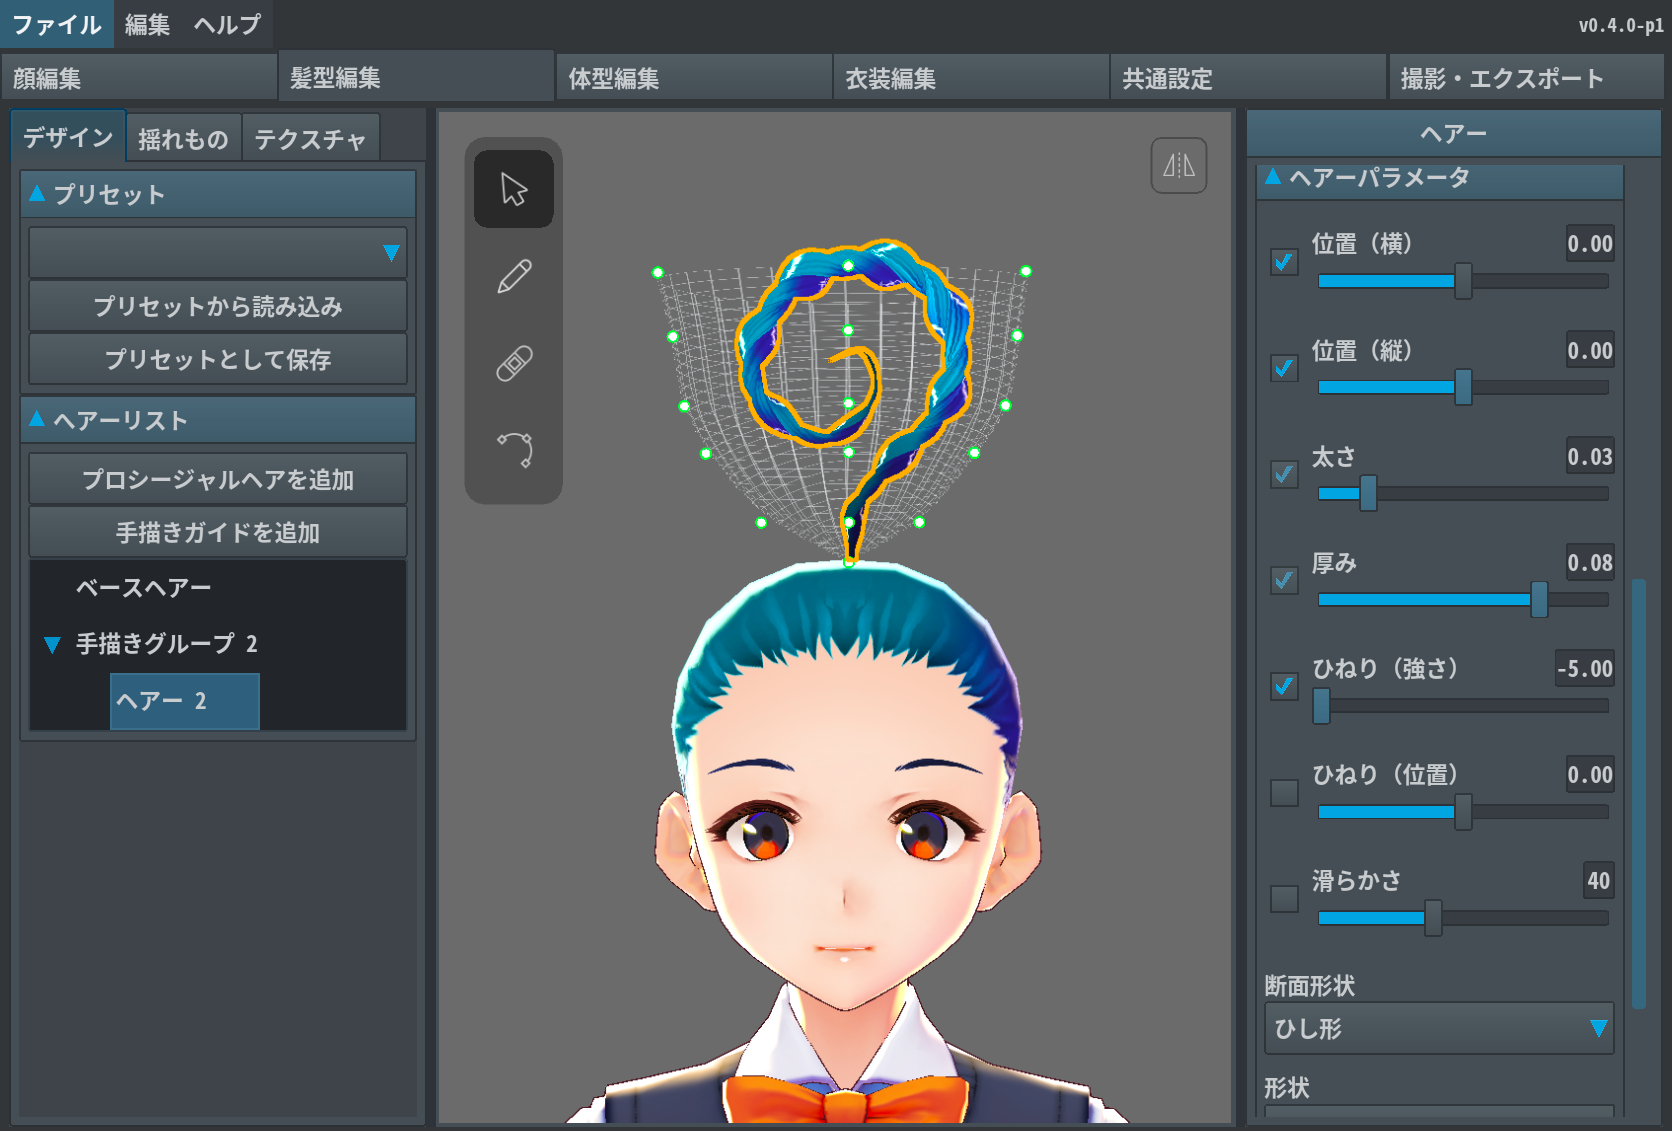
This guide will show you how to model stray hairs, growing from the top of a character's head.
Painting the hair from the start would make the process quite difficult to follow, so the point is to edit the guide's shape first. Since we will turn the guide inside out, you'll have to draw hair from the back side of the guide.
① Add a Brush Guide in Hair Editor > Design.
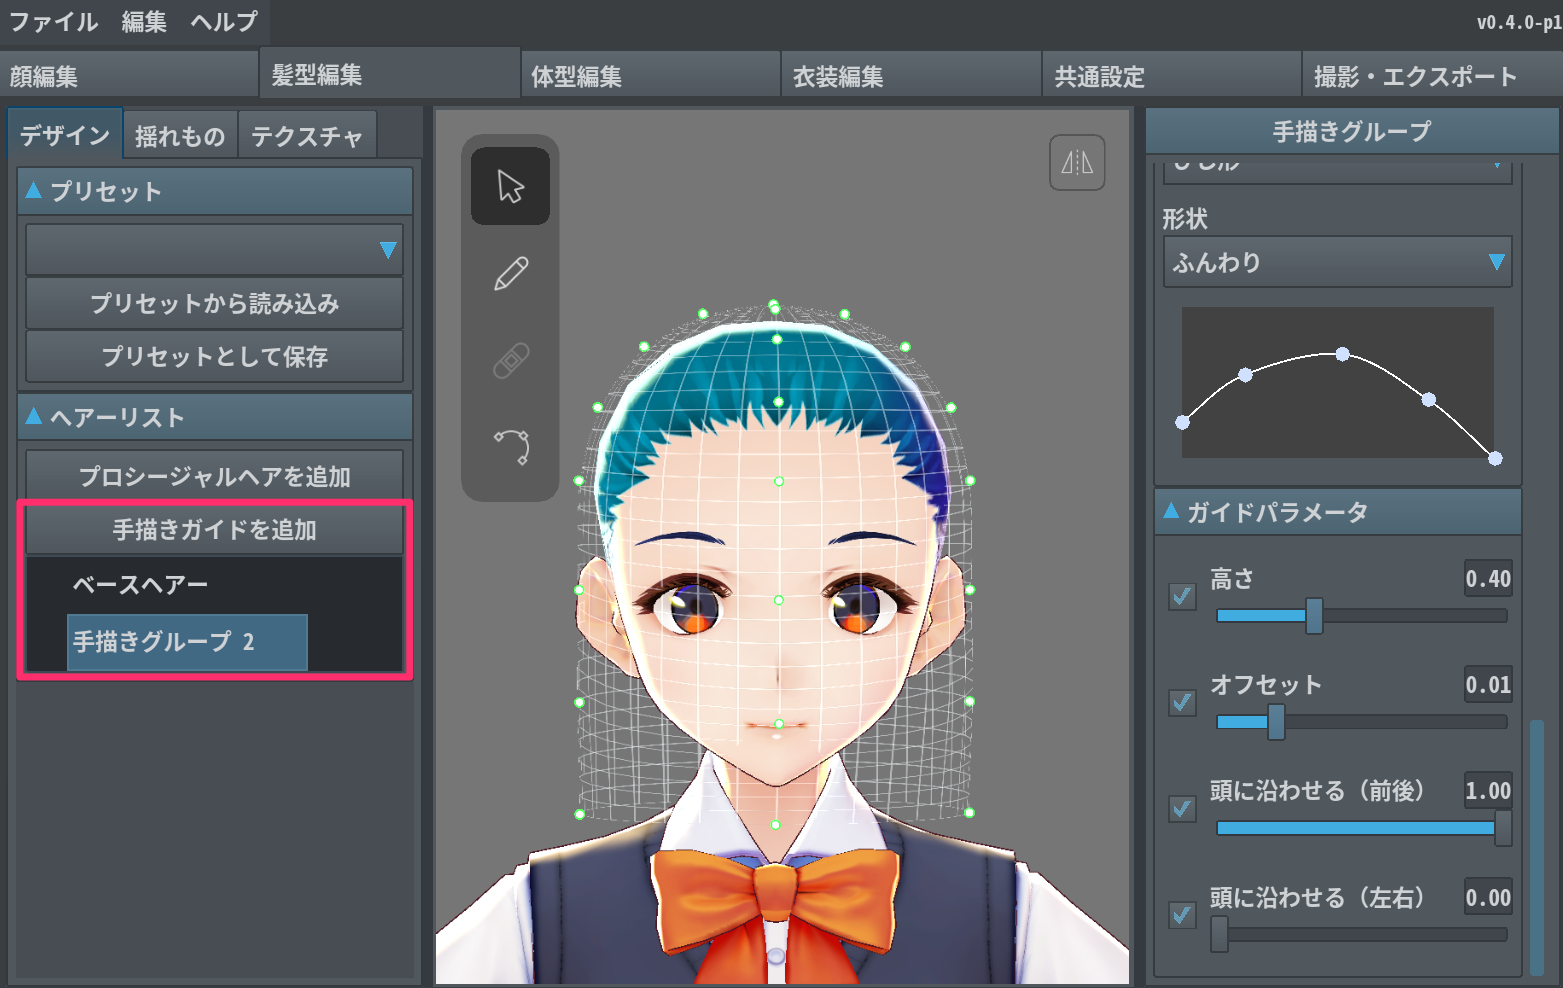
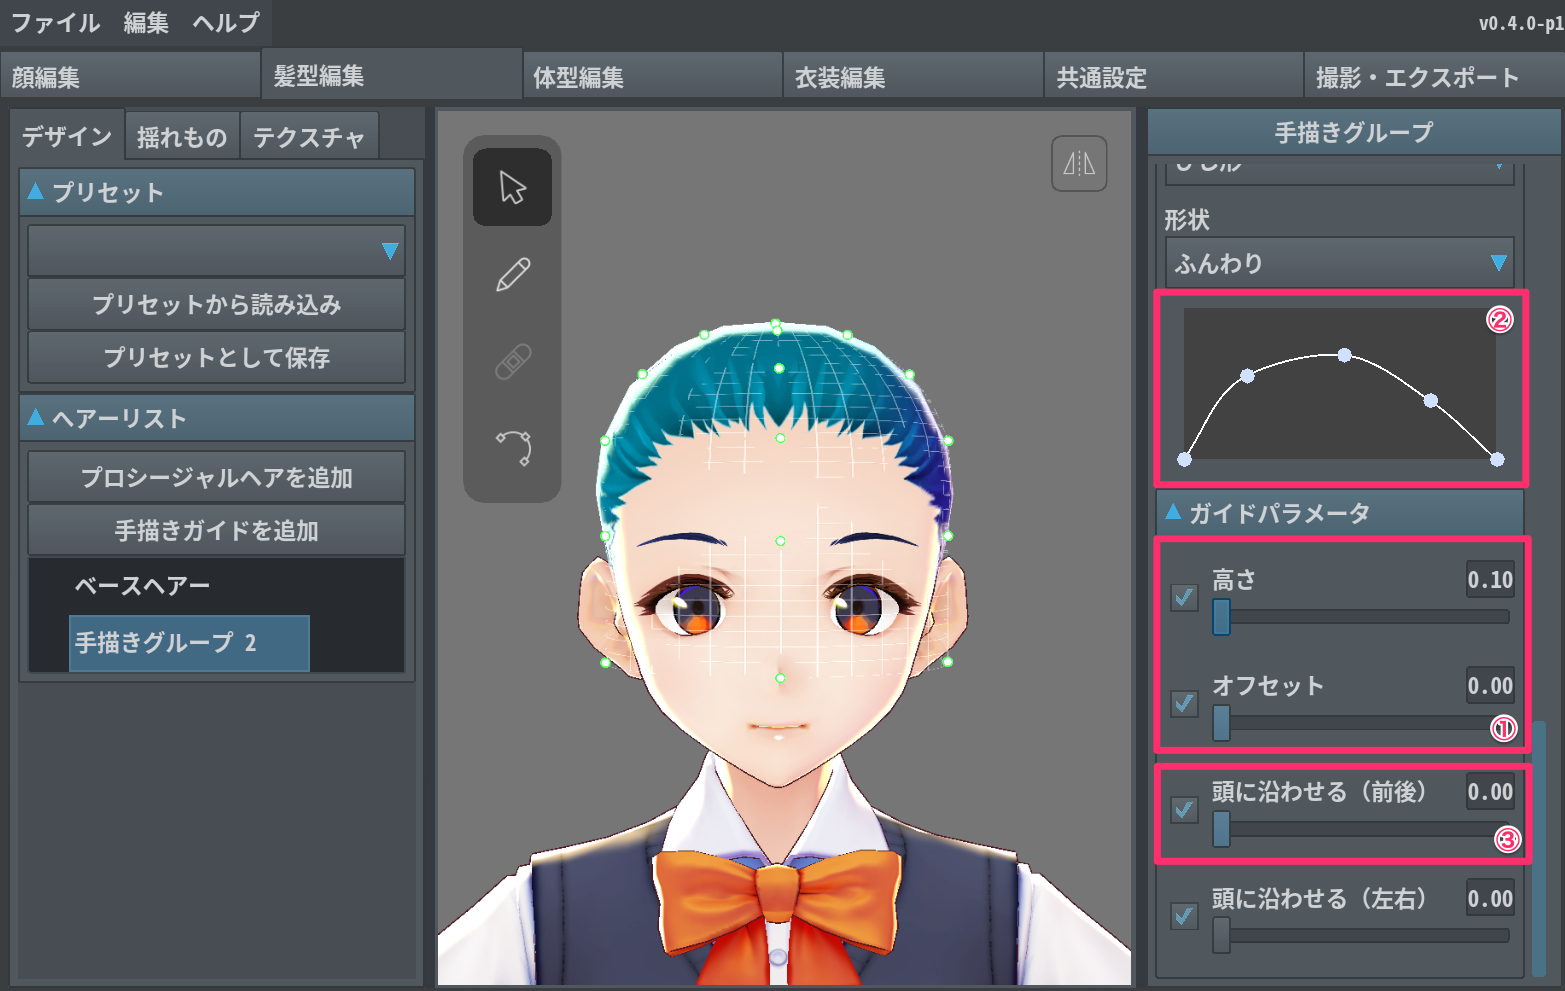
② Move the ""height"" and ""offset"" sliders in the guide parameters of the property panel on the right to the leftmost position (height: 0.10; offset: 0.00)
③ Adjust the curve in the hair parameters section. Make sure that the leftmost point comes to the left corner.
④ Move the slider of the guide parameter "Conformity (X)" all the way to the left (0.00).
⑤ Move the control points on the guide mesh of the head toward the center/top of the head and turn the mesh inside out. (Start from the points closest to the crown. By moving the points over the edge of the head, the mesh will turn inside out.
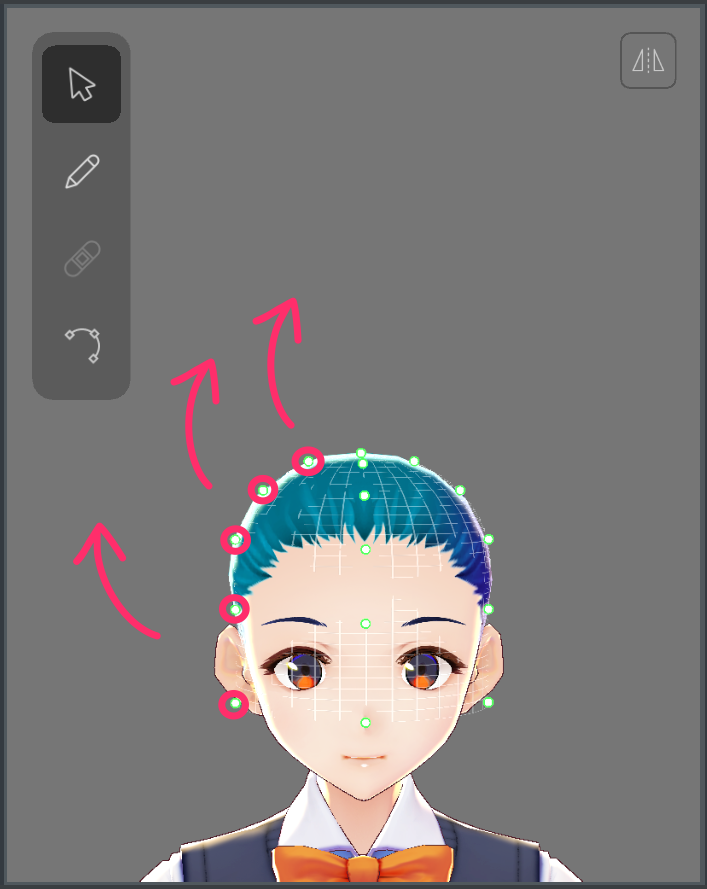
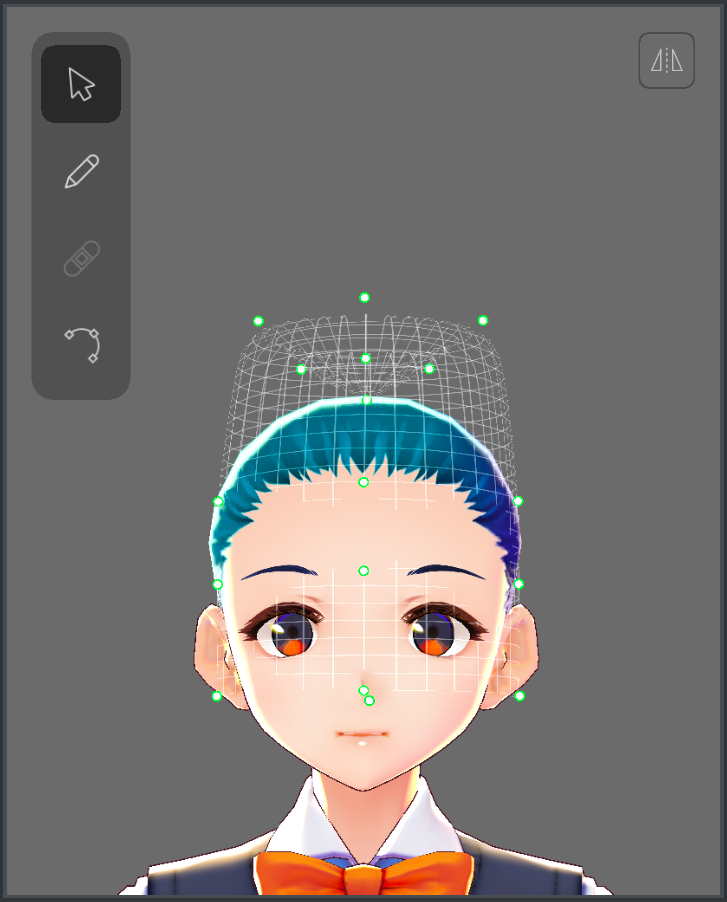
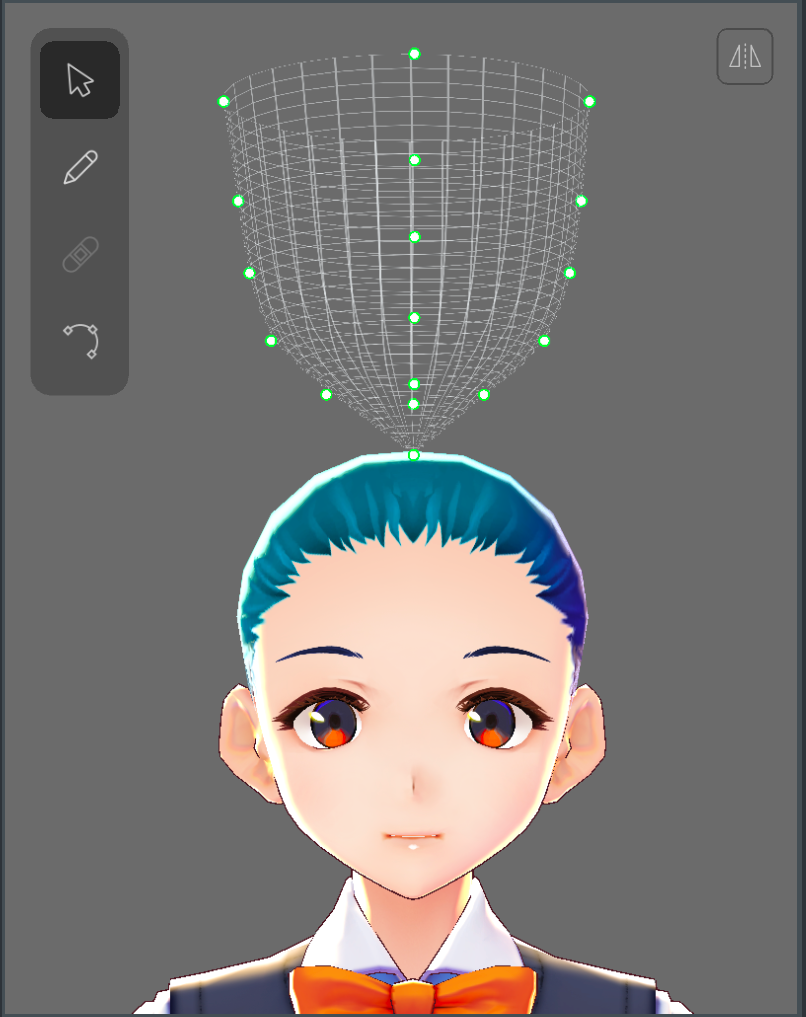
⑥ After modeling a bowl-shaped mesh above your character's head, make the last adjustments by moving each point.
⑦ Rotate the model 180° and draw the hair along the guide with the brush tool. The hair is drawn on the guide on the front side of the model's face.
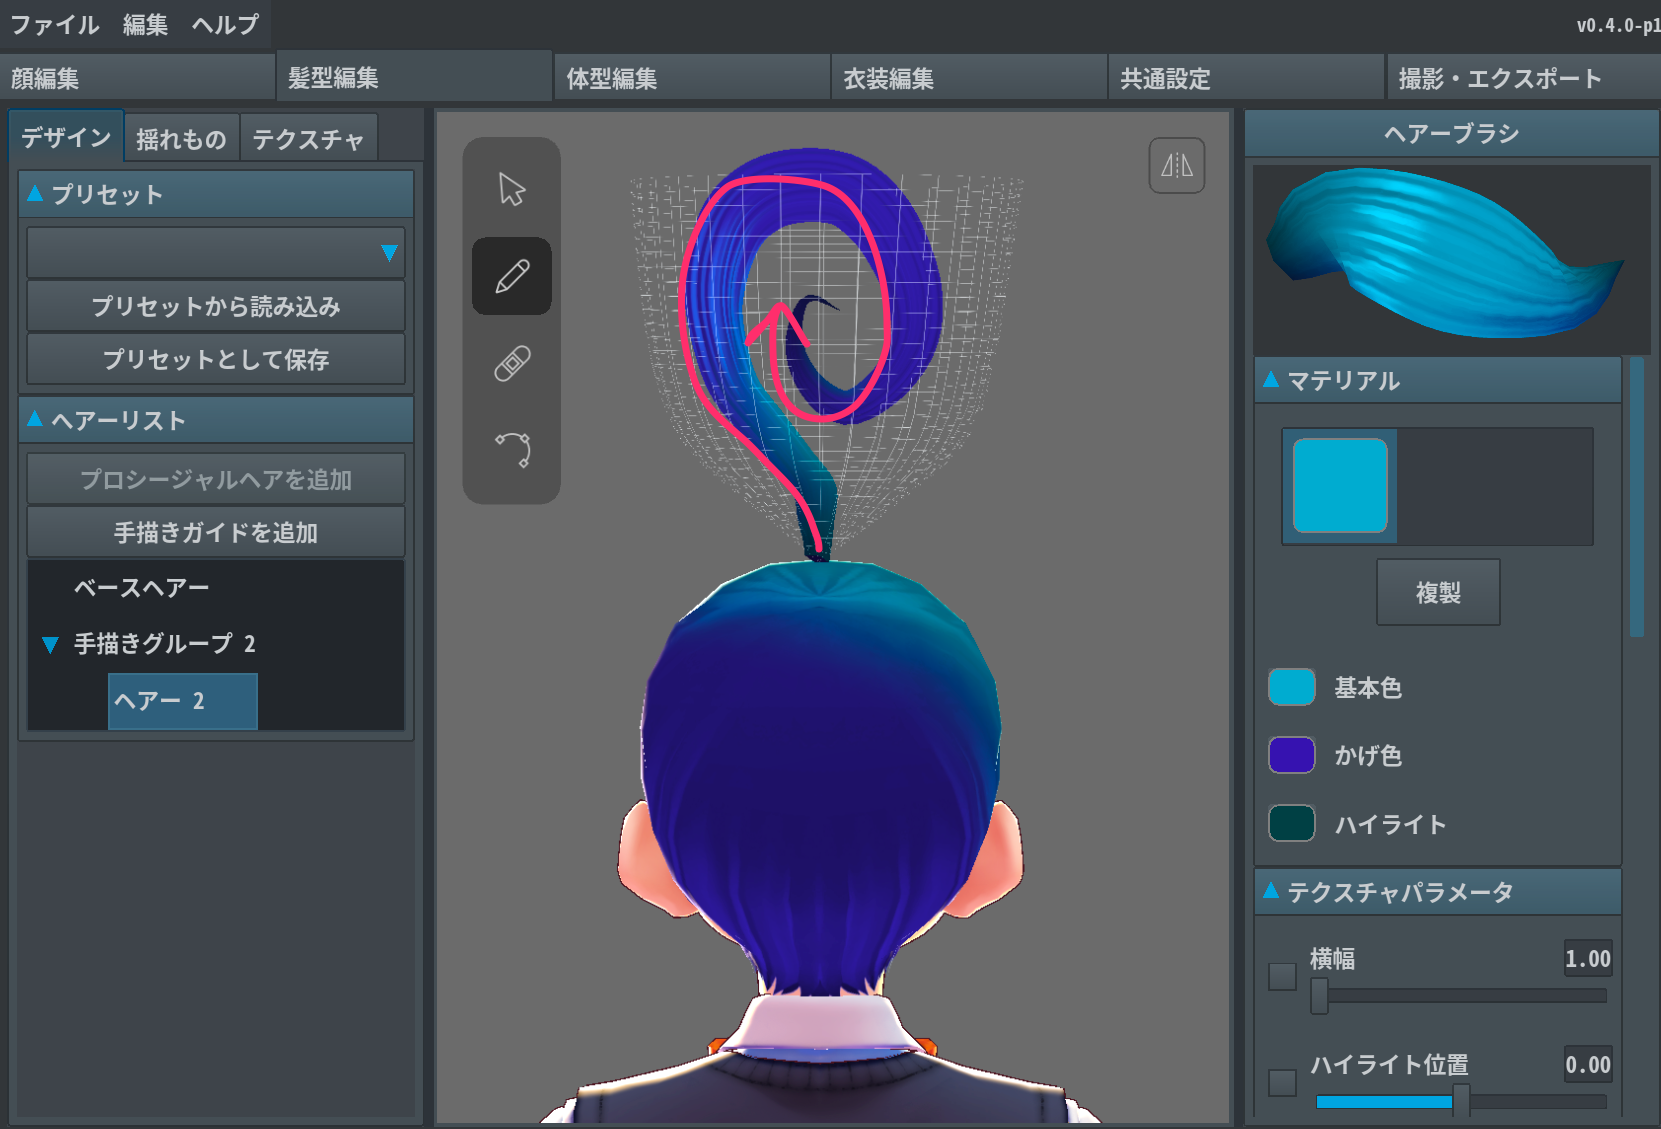
Looking at the model from the side, you'll notice that the hair is drawn on the mesh on the top of your character's head.
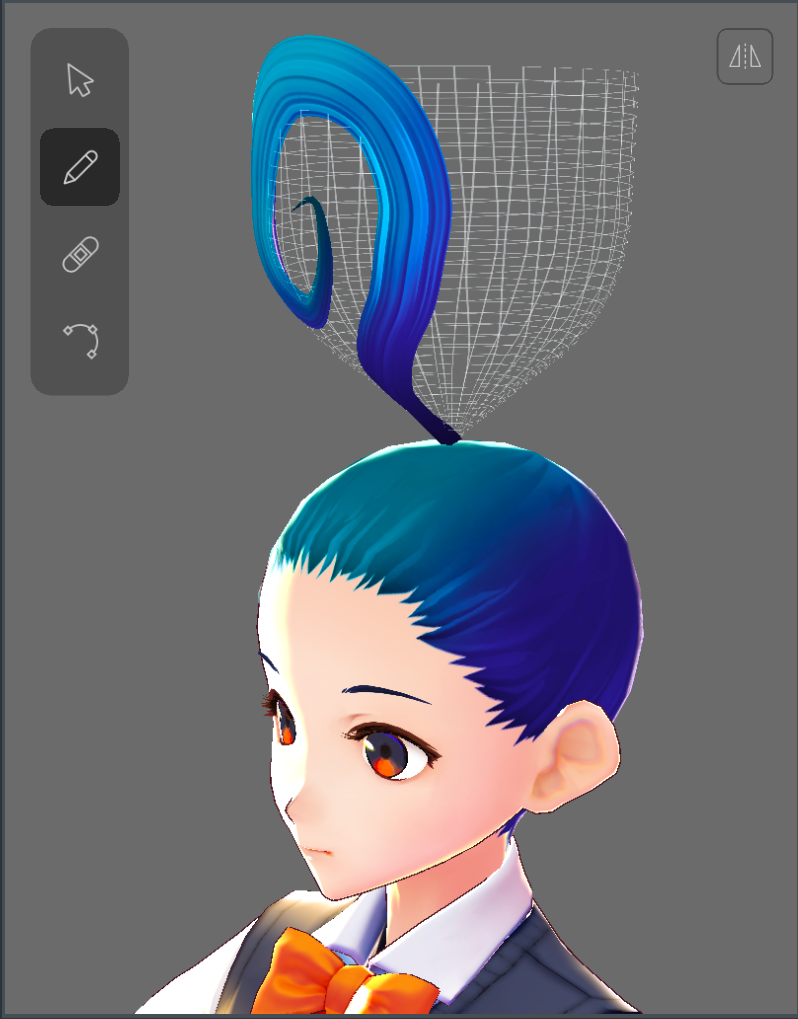
⑧ Use the selection tool to move the control point of the guides and adjust their position.
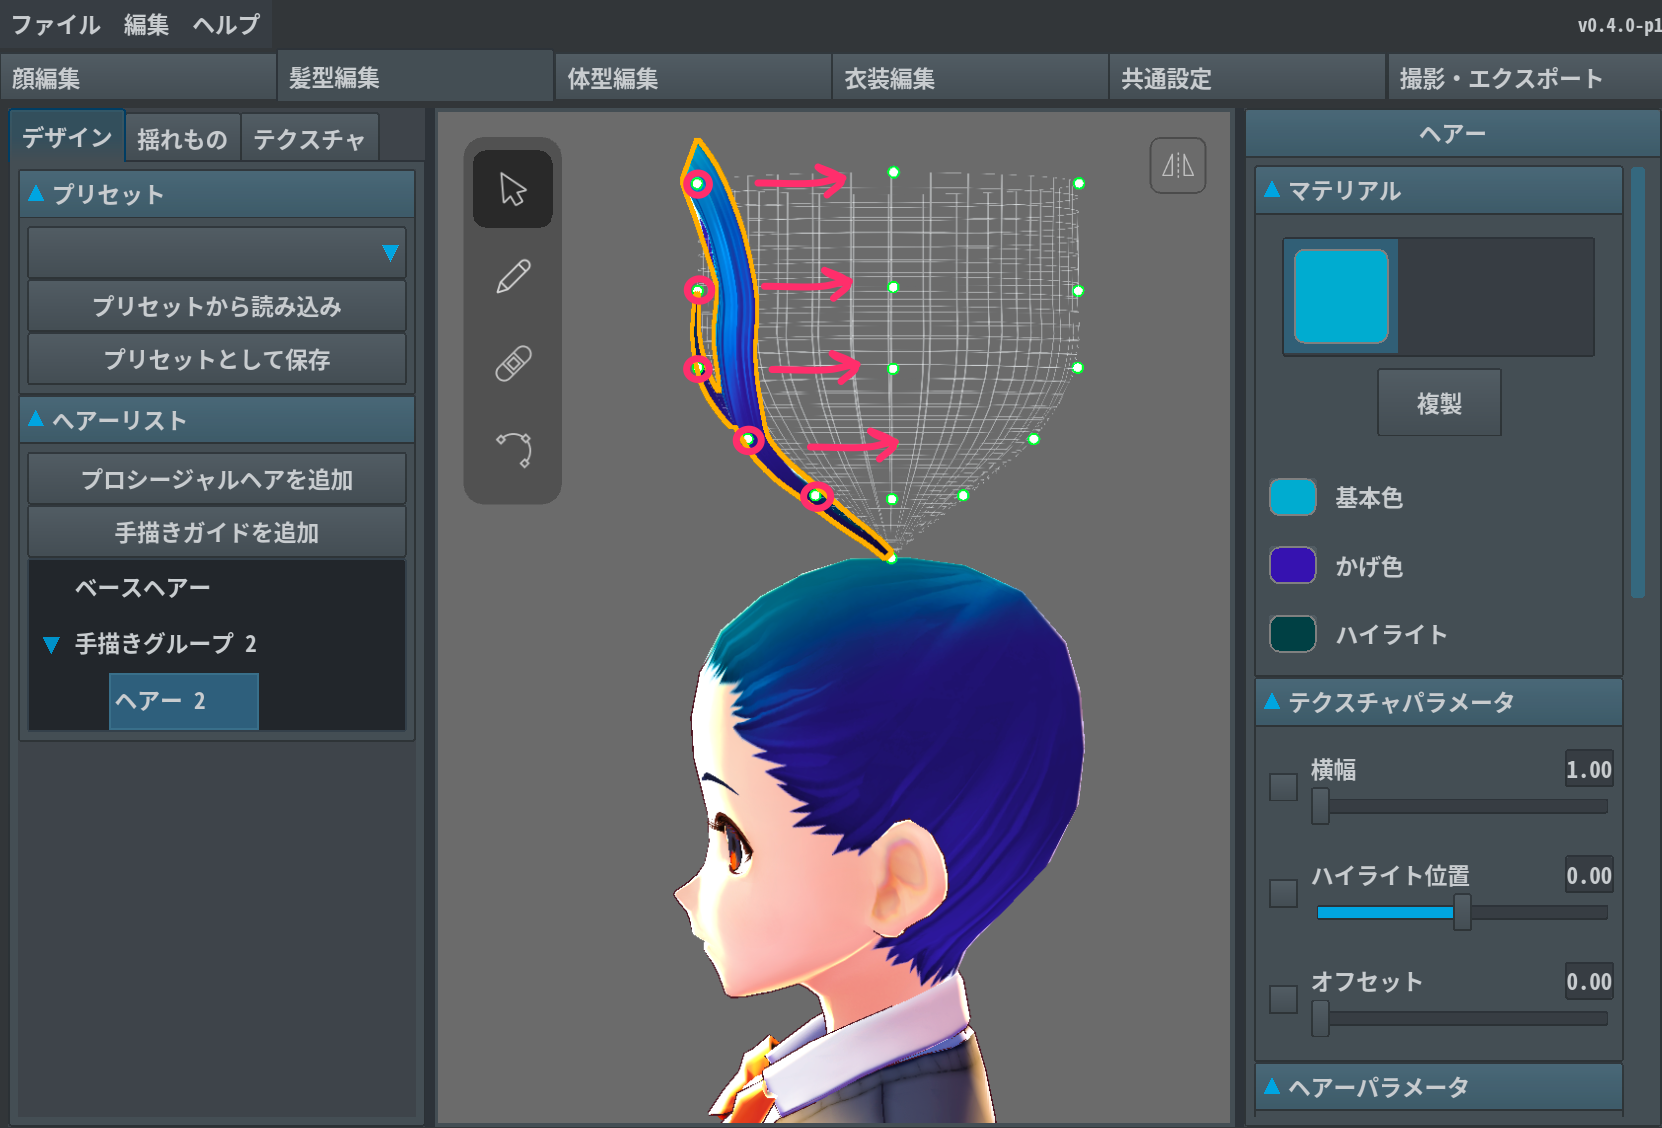
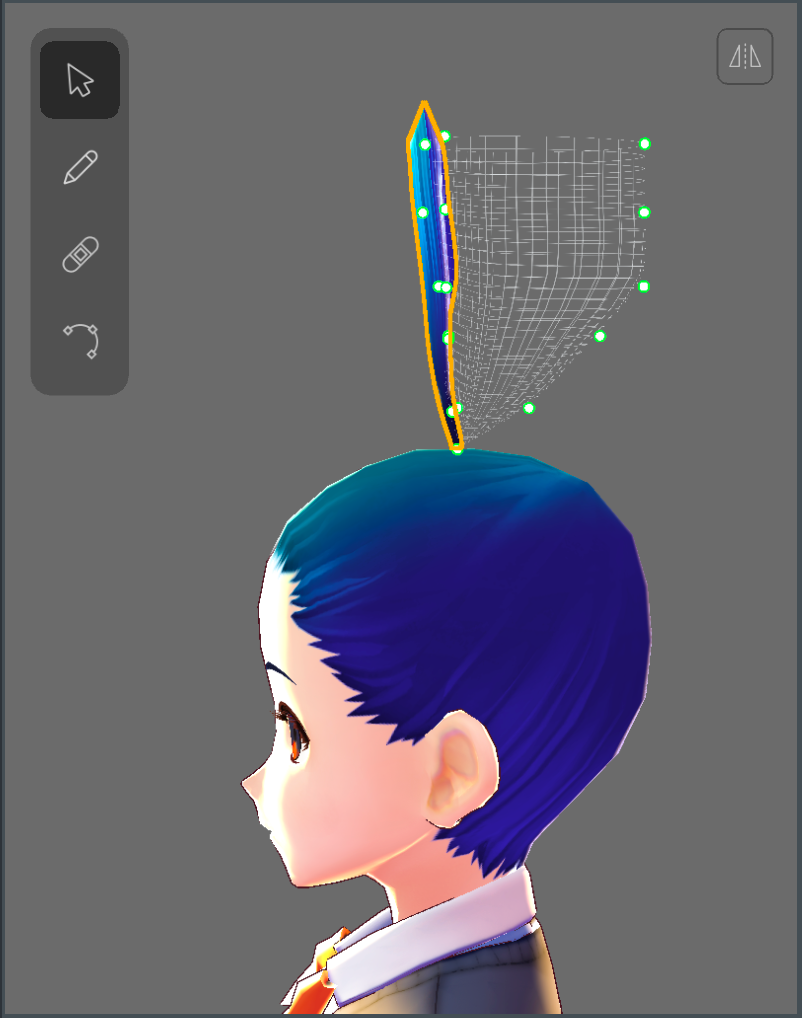
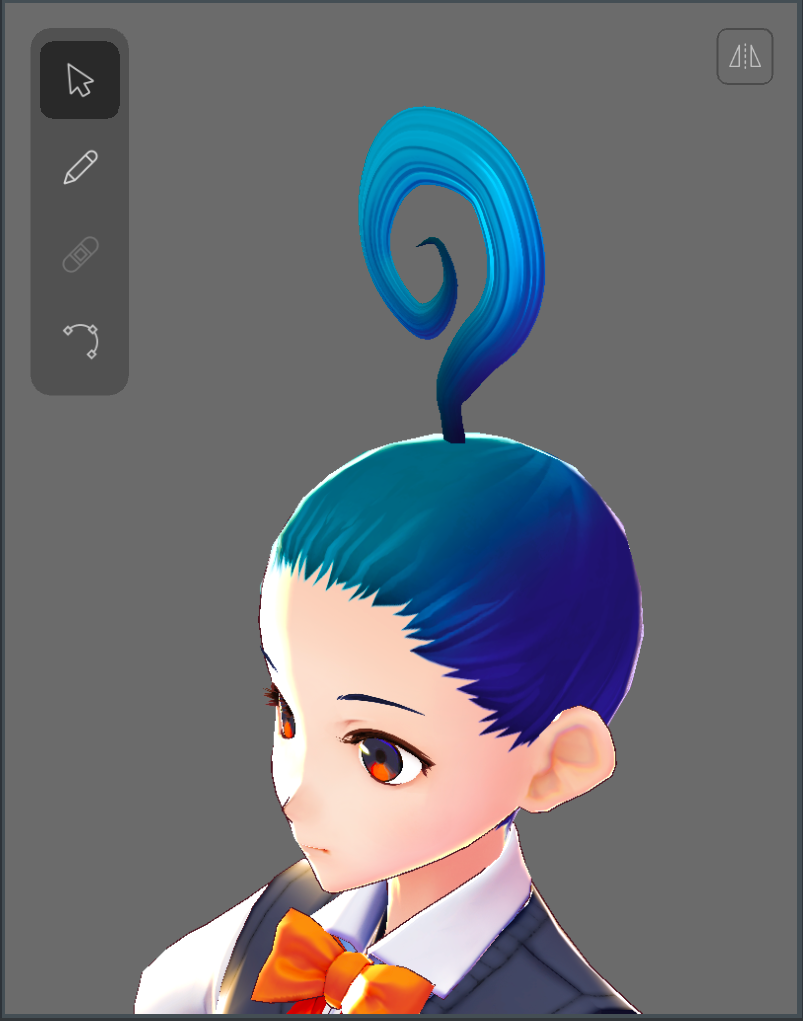
⑨ In the property panel, adjust the parameters of each element such as position, twist, thickness etc.